

Your first invoice (tutorial)
This tutorial takes a new business from an empty Sales area to a paid invoice. You will add a customer, create an invoice with two lines, send it, and record the customer’s payment. Along the way you will see what OneBooks posts to the ledger, so nothing is a black box.
Before you start
Section titled “Before you start”- You are signed in and your business is set up — at least the tax rate is right.
- Your role is Owner, Admin or Member (viewers cannot create documents).
1. Add a customer
Section titled “1. Add a customer”- Open Sales → Customers and select Add Customer.
- Enter the name (required). Add an email if you want to email invoices, and the customer’s tax ID if they are tax-registered — it prints on the invoice.
- Select Save.
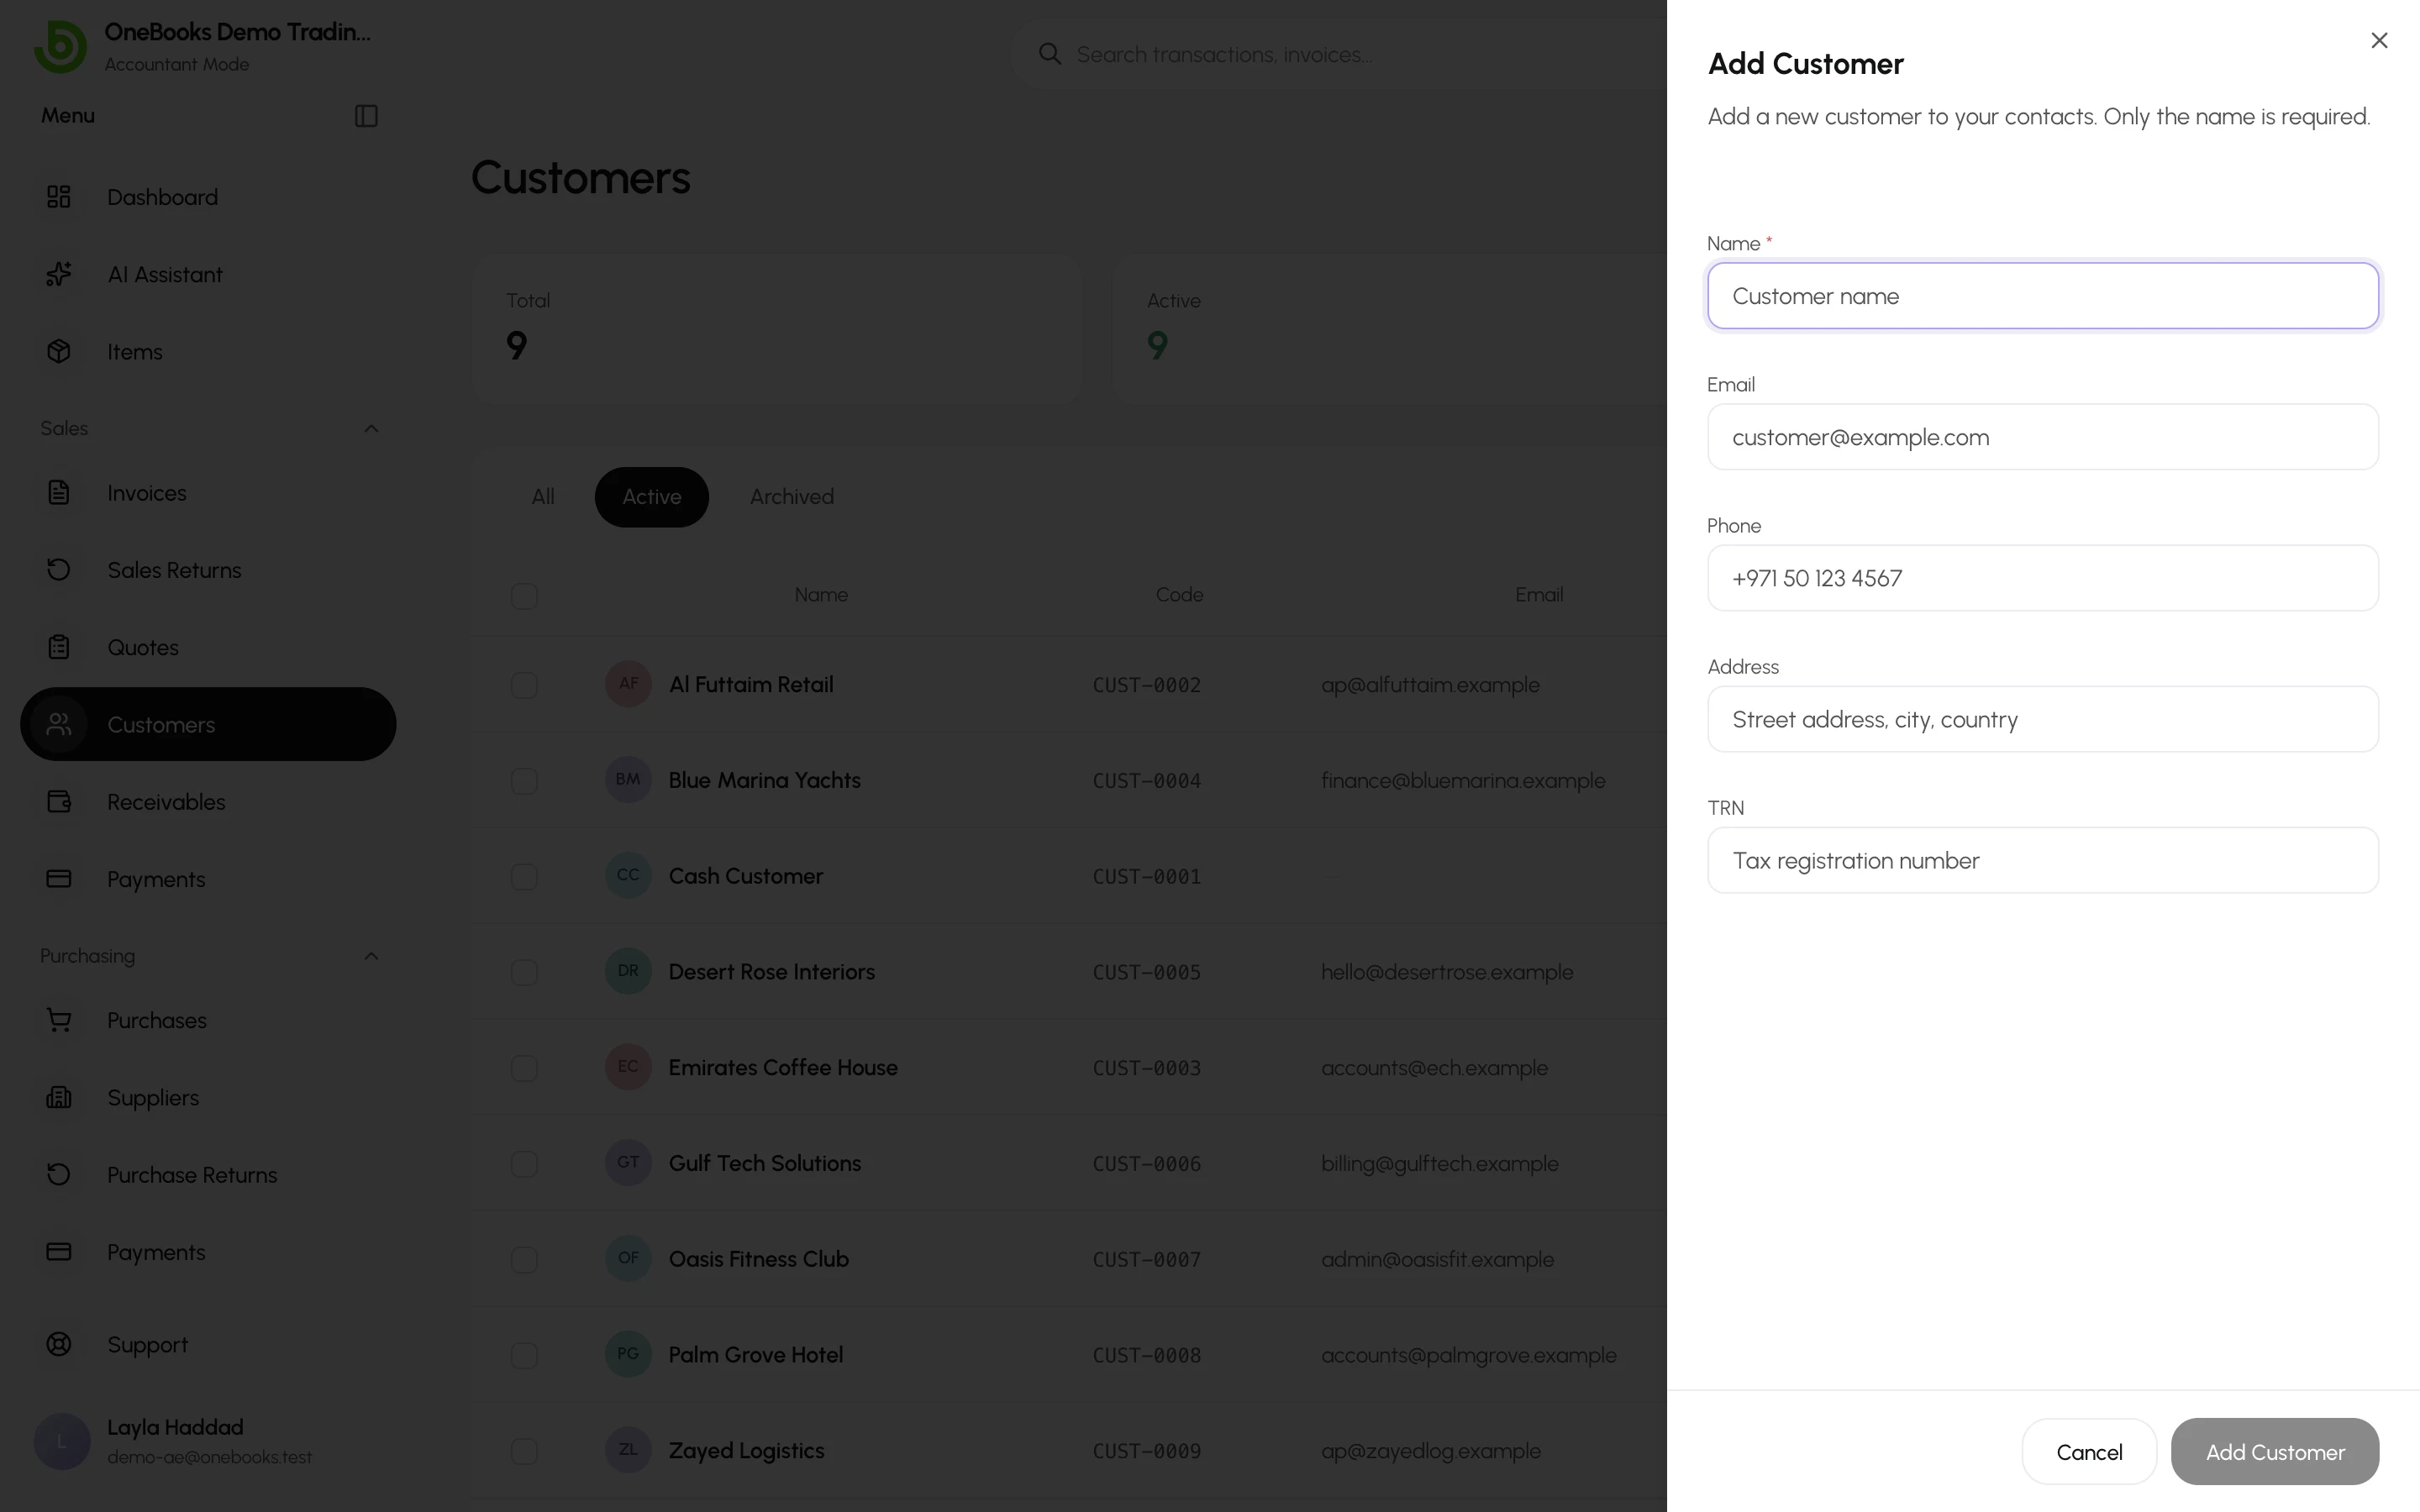
For cash sales you can use the built-in Cash Customer instead of creating one.
2. Create the invoice
Section titled “2. Create the invoice”- Open Sales → Invoices and select Create Invoice.
- Under Bill To, pick the customer you just created.
- Check the Invoice Date and Due Date (the due date defaults from your payment terms).
- Add line items: choose an item from your catalog or type a description, then the quantity, unit price and tax %. Select Add Line Item for more lines.
- Optionally add a discount (a percentage or an amount, applied before tax) and notes / terms.
- Select Save as Draft to keep editing later, or Save to finish.
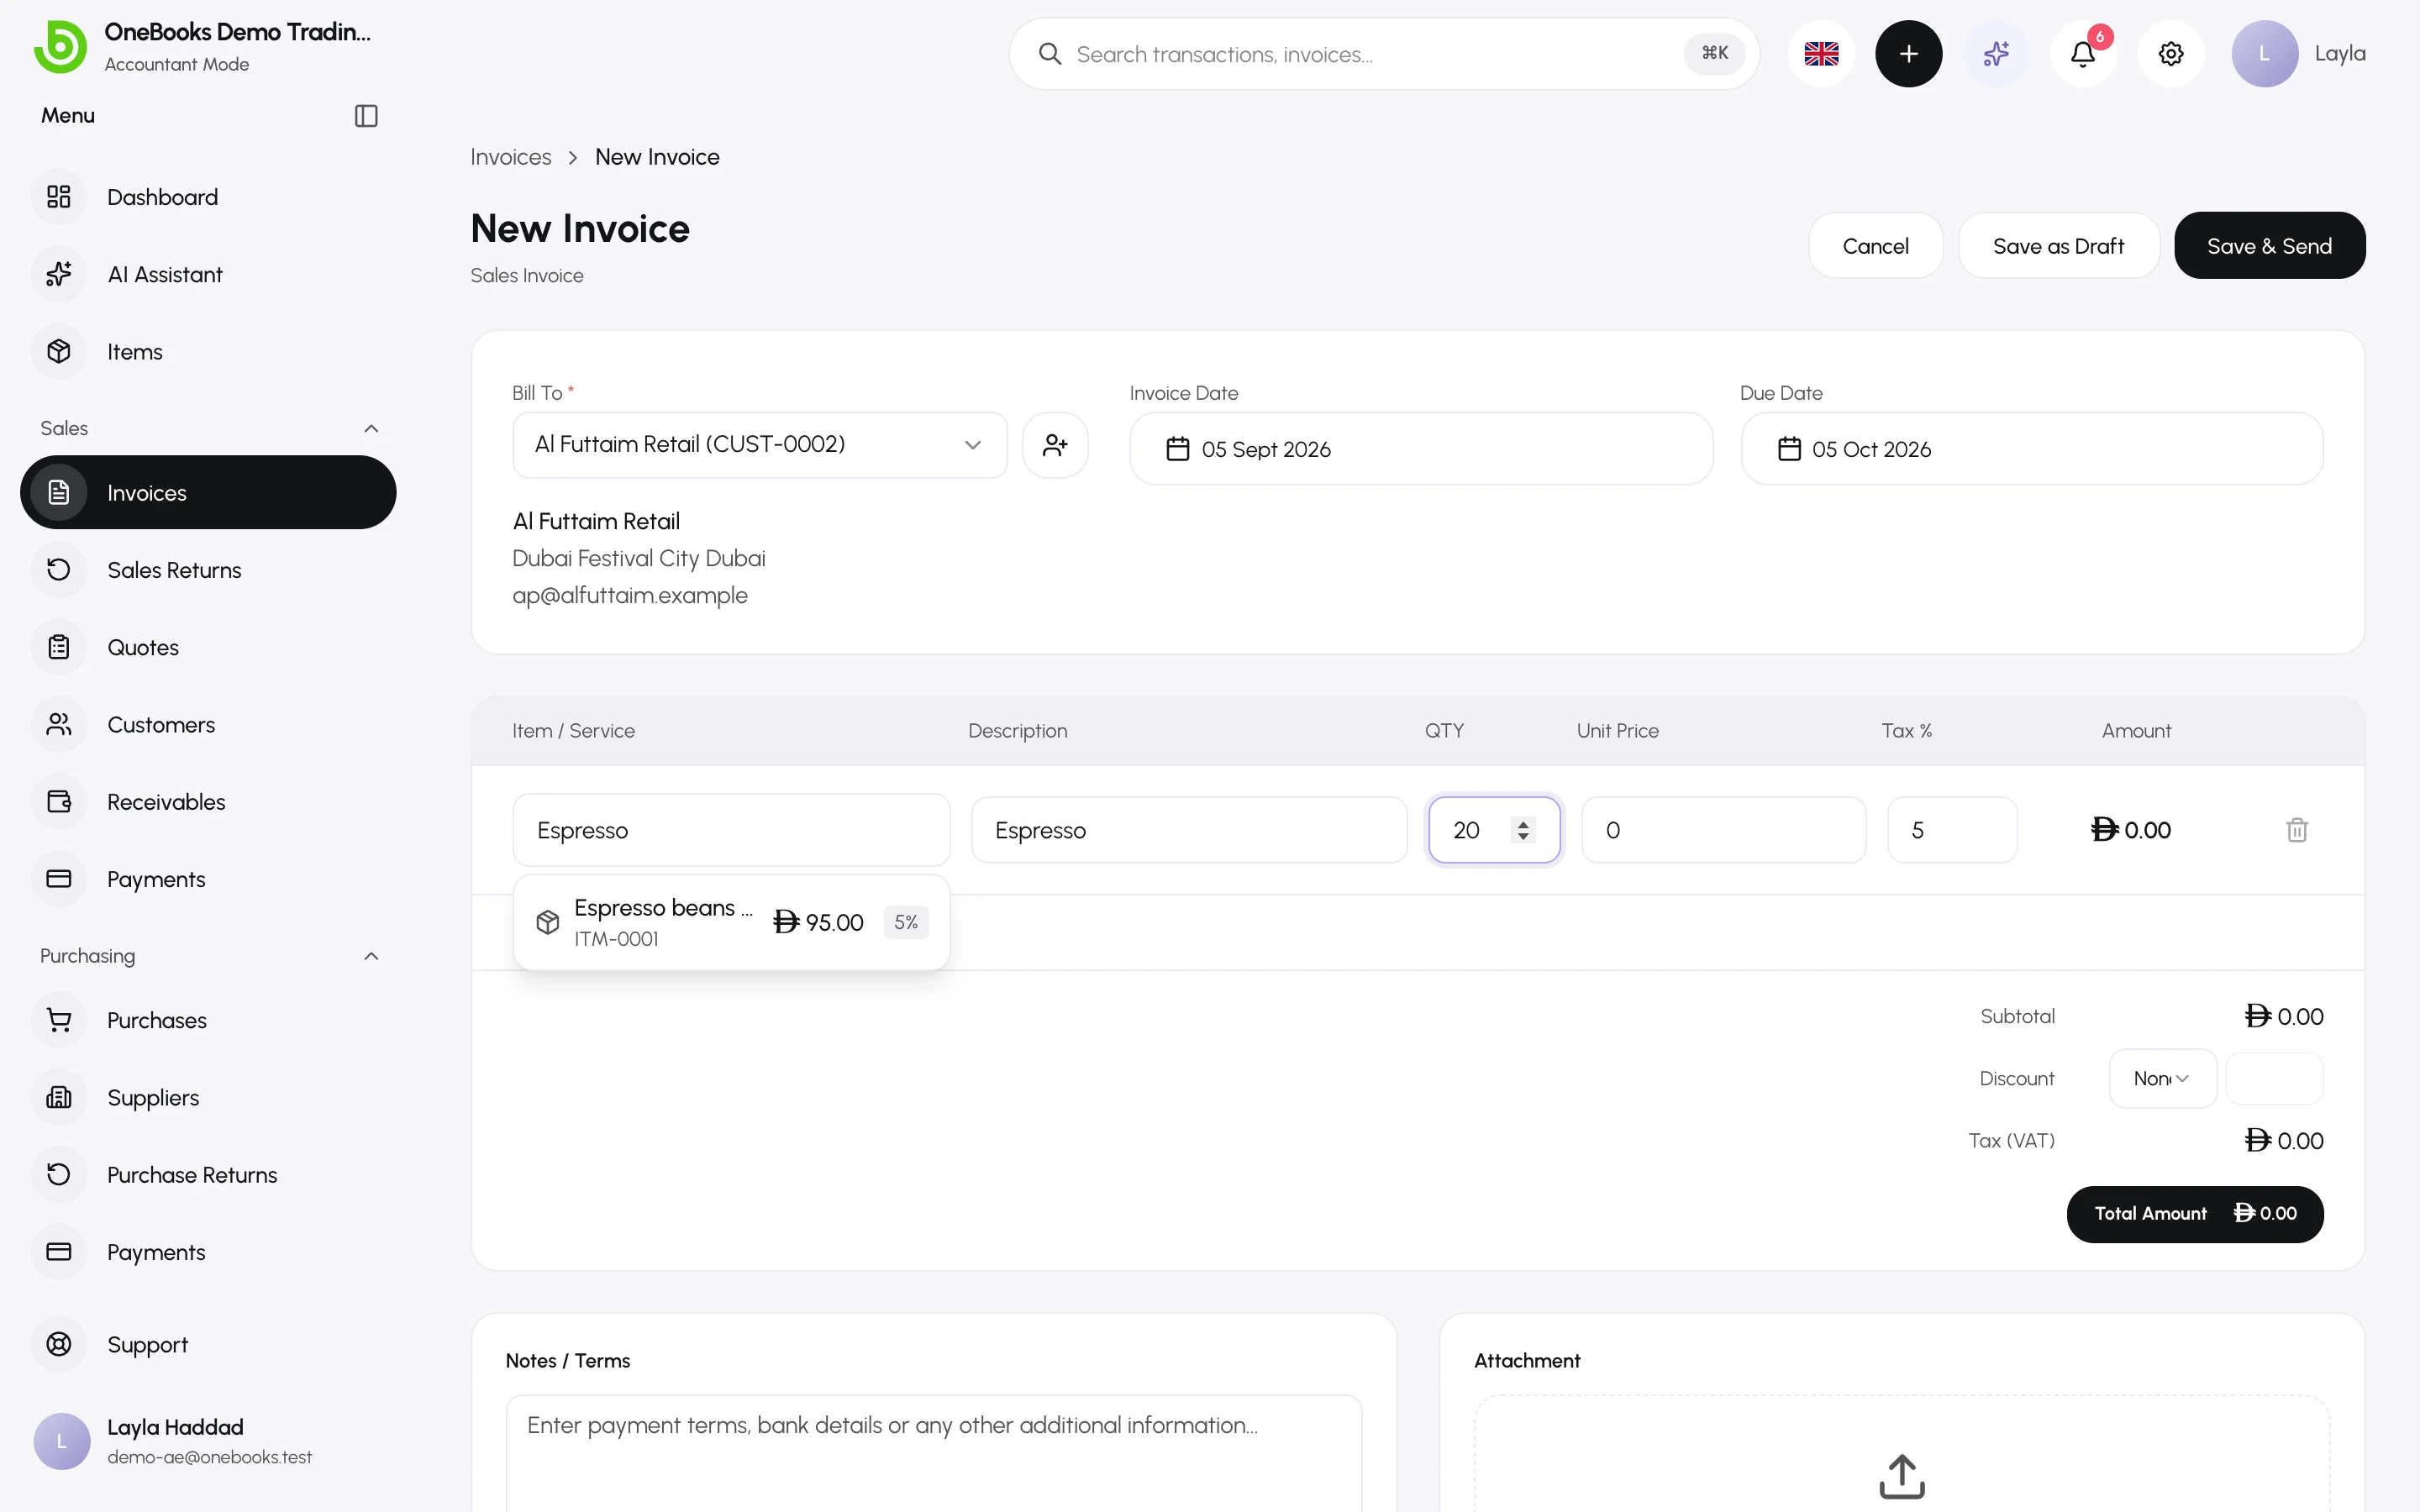
The totals panel shows Subtotal, Tax and Total. If your business uses tax-inclusive pricing, the unit price you type already contains the tax and the panel shows how much of it is tax.
3. Send the invoice
Section titled “3. Send the invoice”A draft is editable and posts nothing. Sending it makes it final.
- Open the draft invoice and choose a channel in the header: Email, WhatsApp or Download PDF (to send the PDF yourself). Or select Save & Send straight from the form.
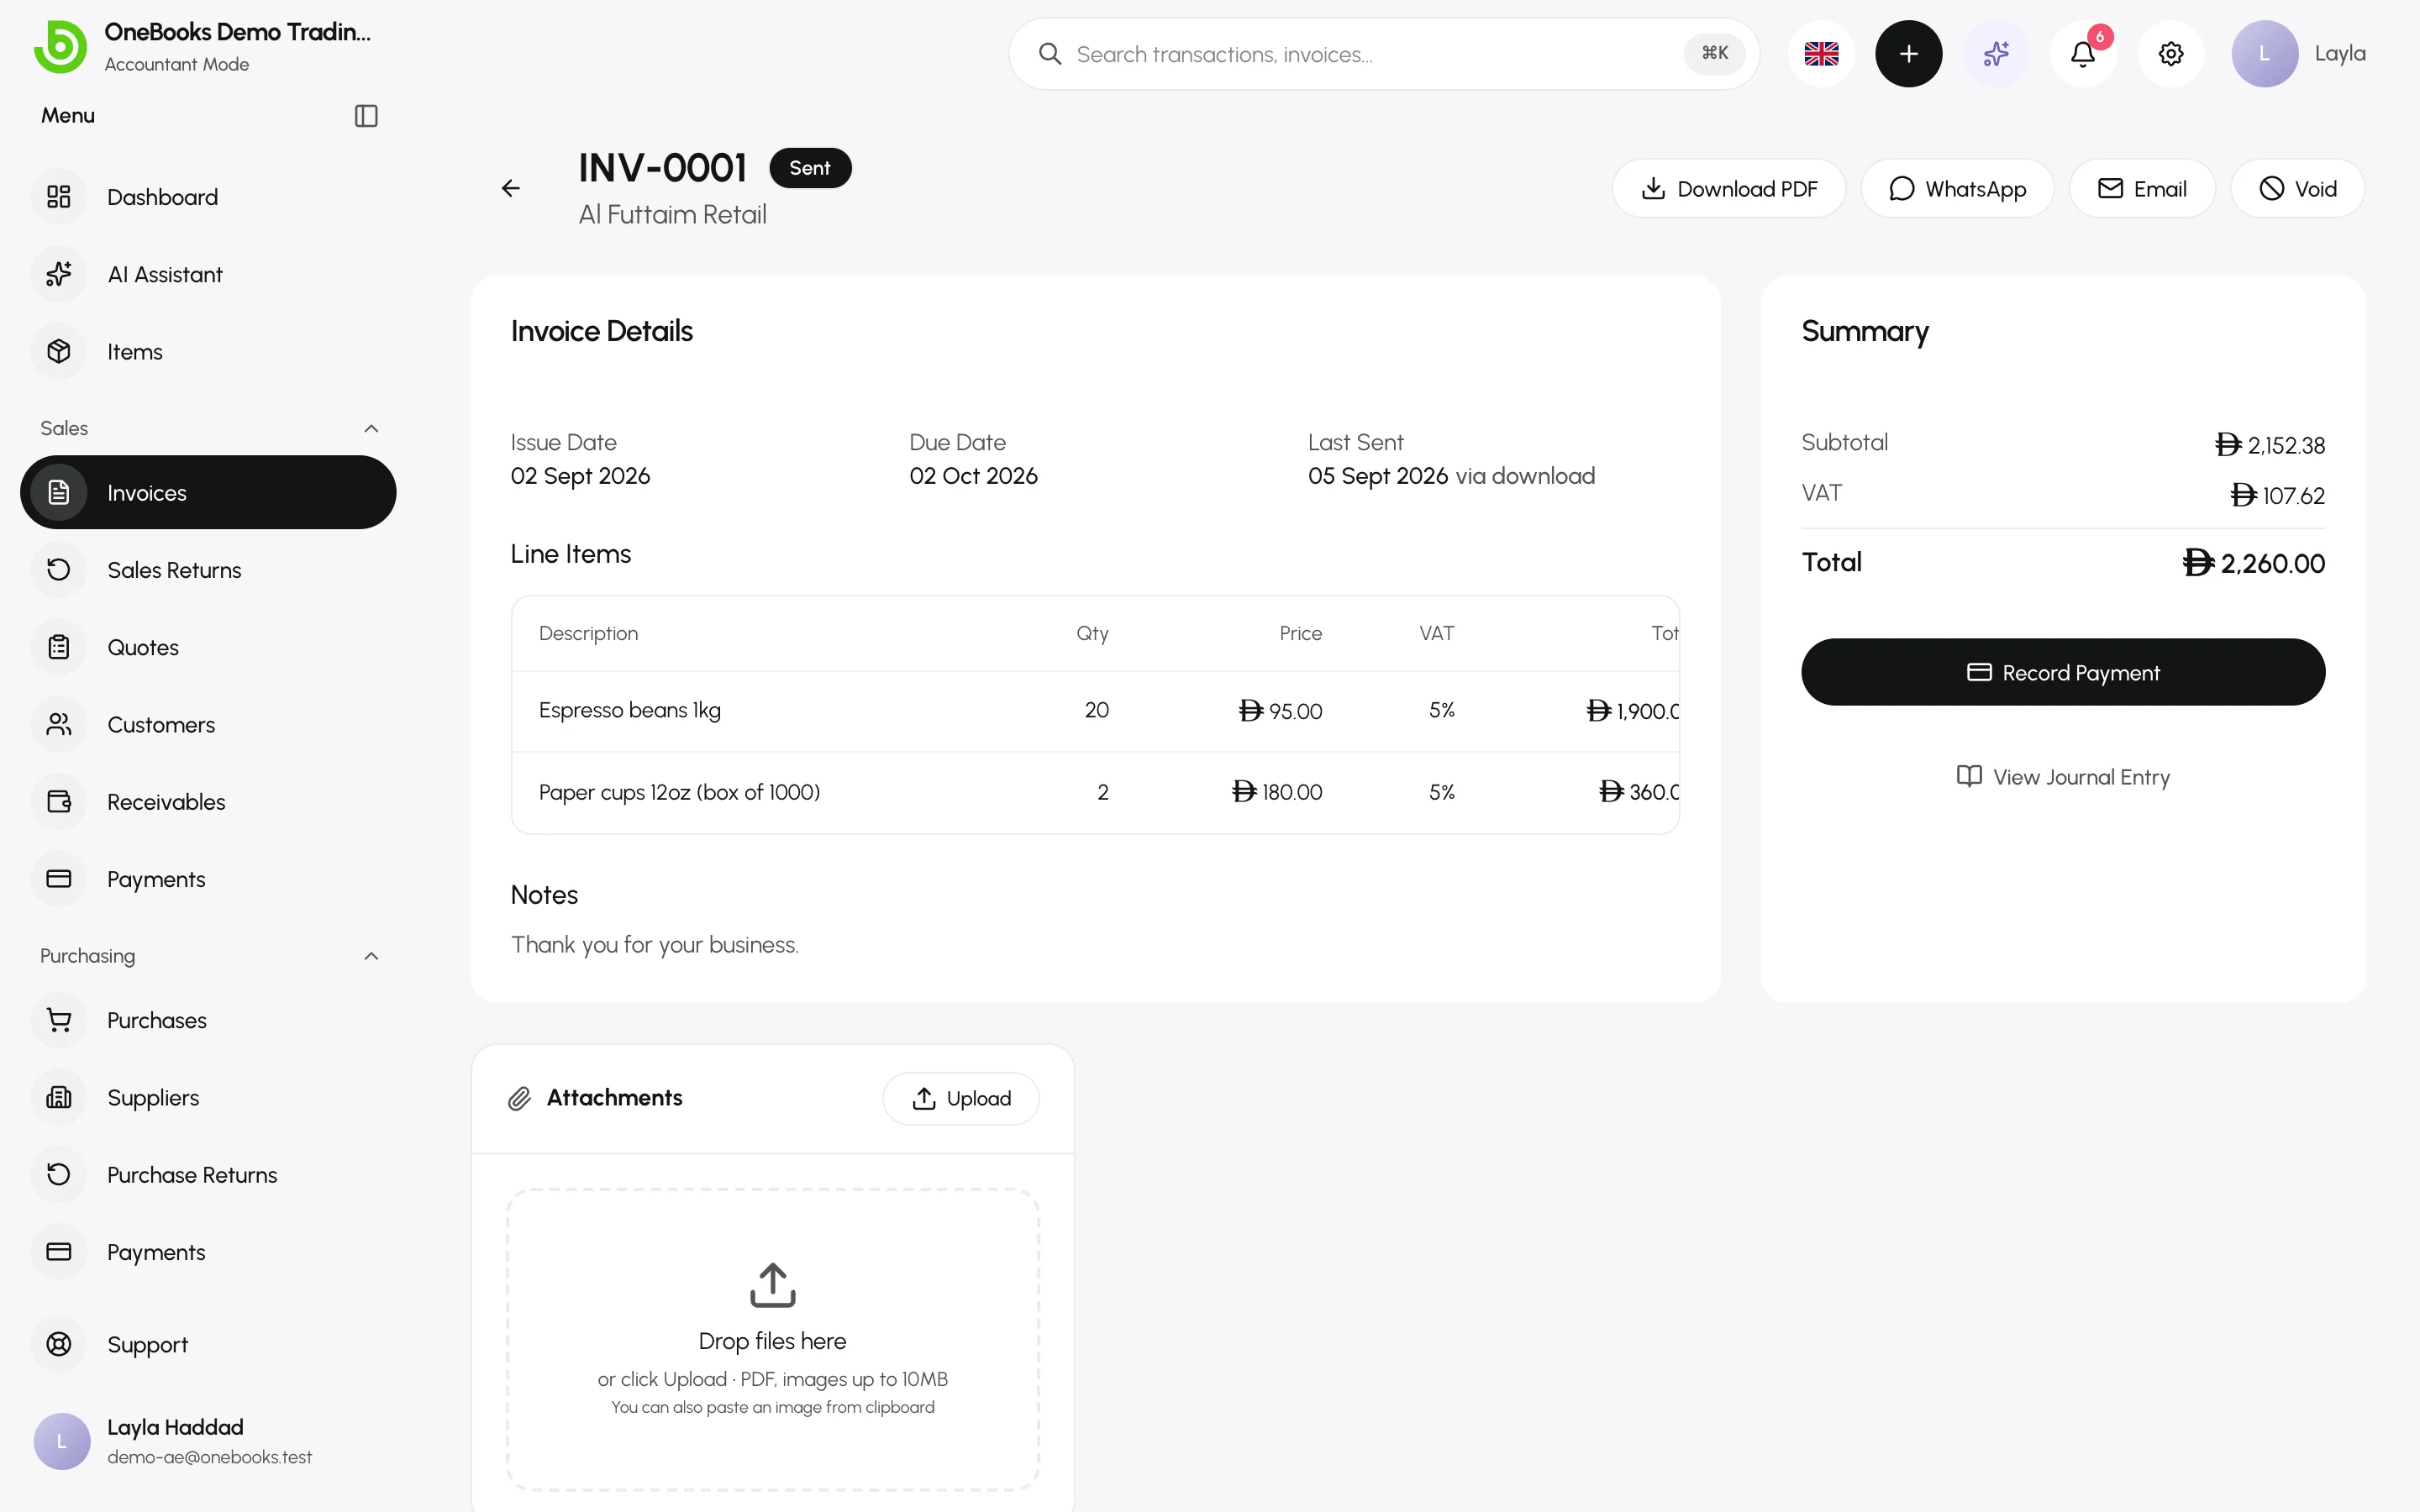
The status changes from Draft to Sent, the invoice number is final, and the accounting entry is posted.
4. Record the payment
Section titled “4. Record the payment”- On the invoice, select Record Payment.
- Enter the amount (a partial amount is fine), the payment date, the method — Cash, Bank Transfer, Card or Other — a reference such as the bank transaction ID, and the cash or bank account the money went into.
- Select Save.
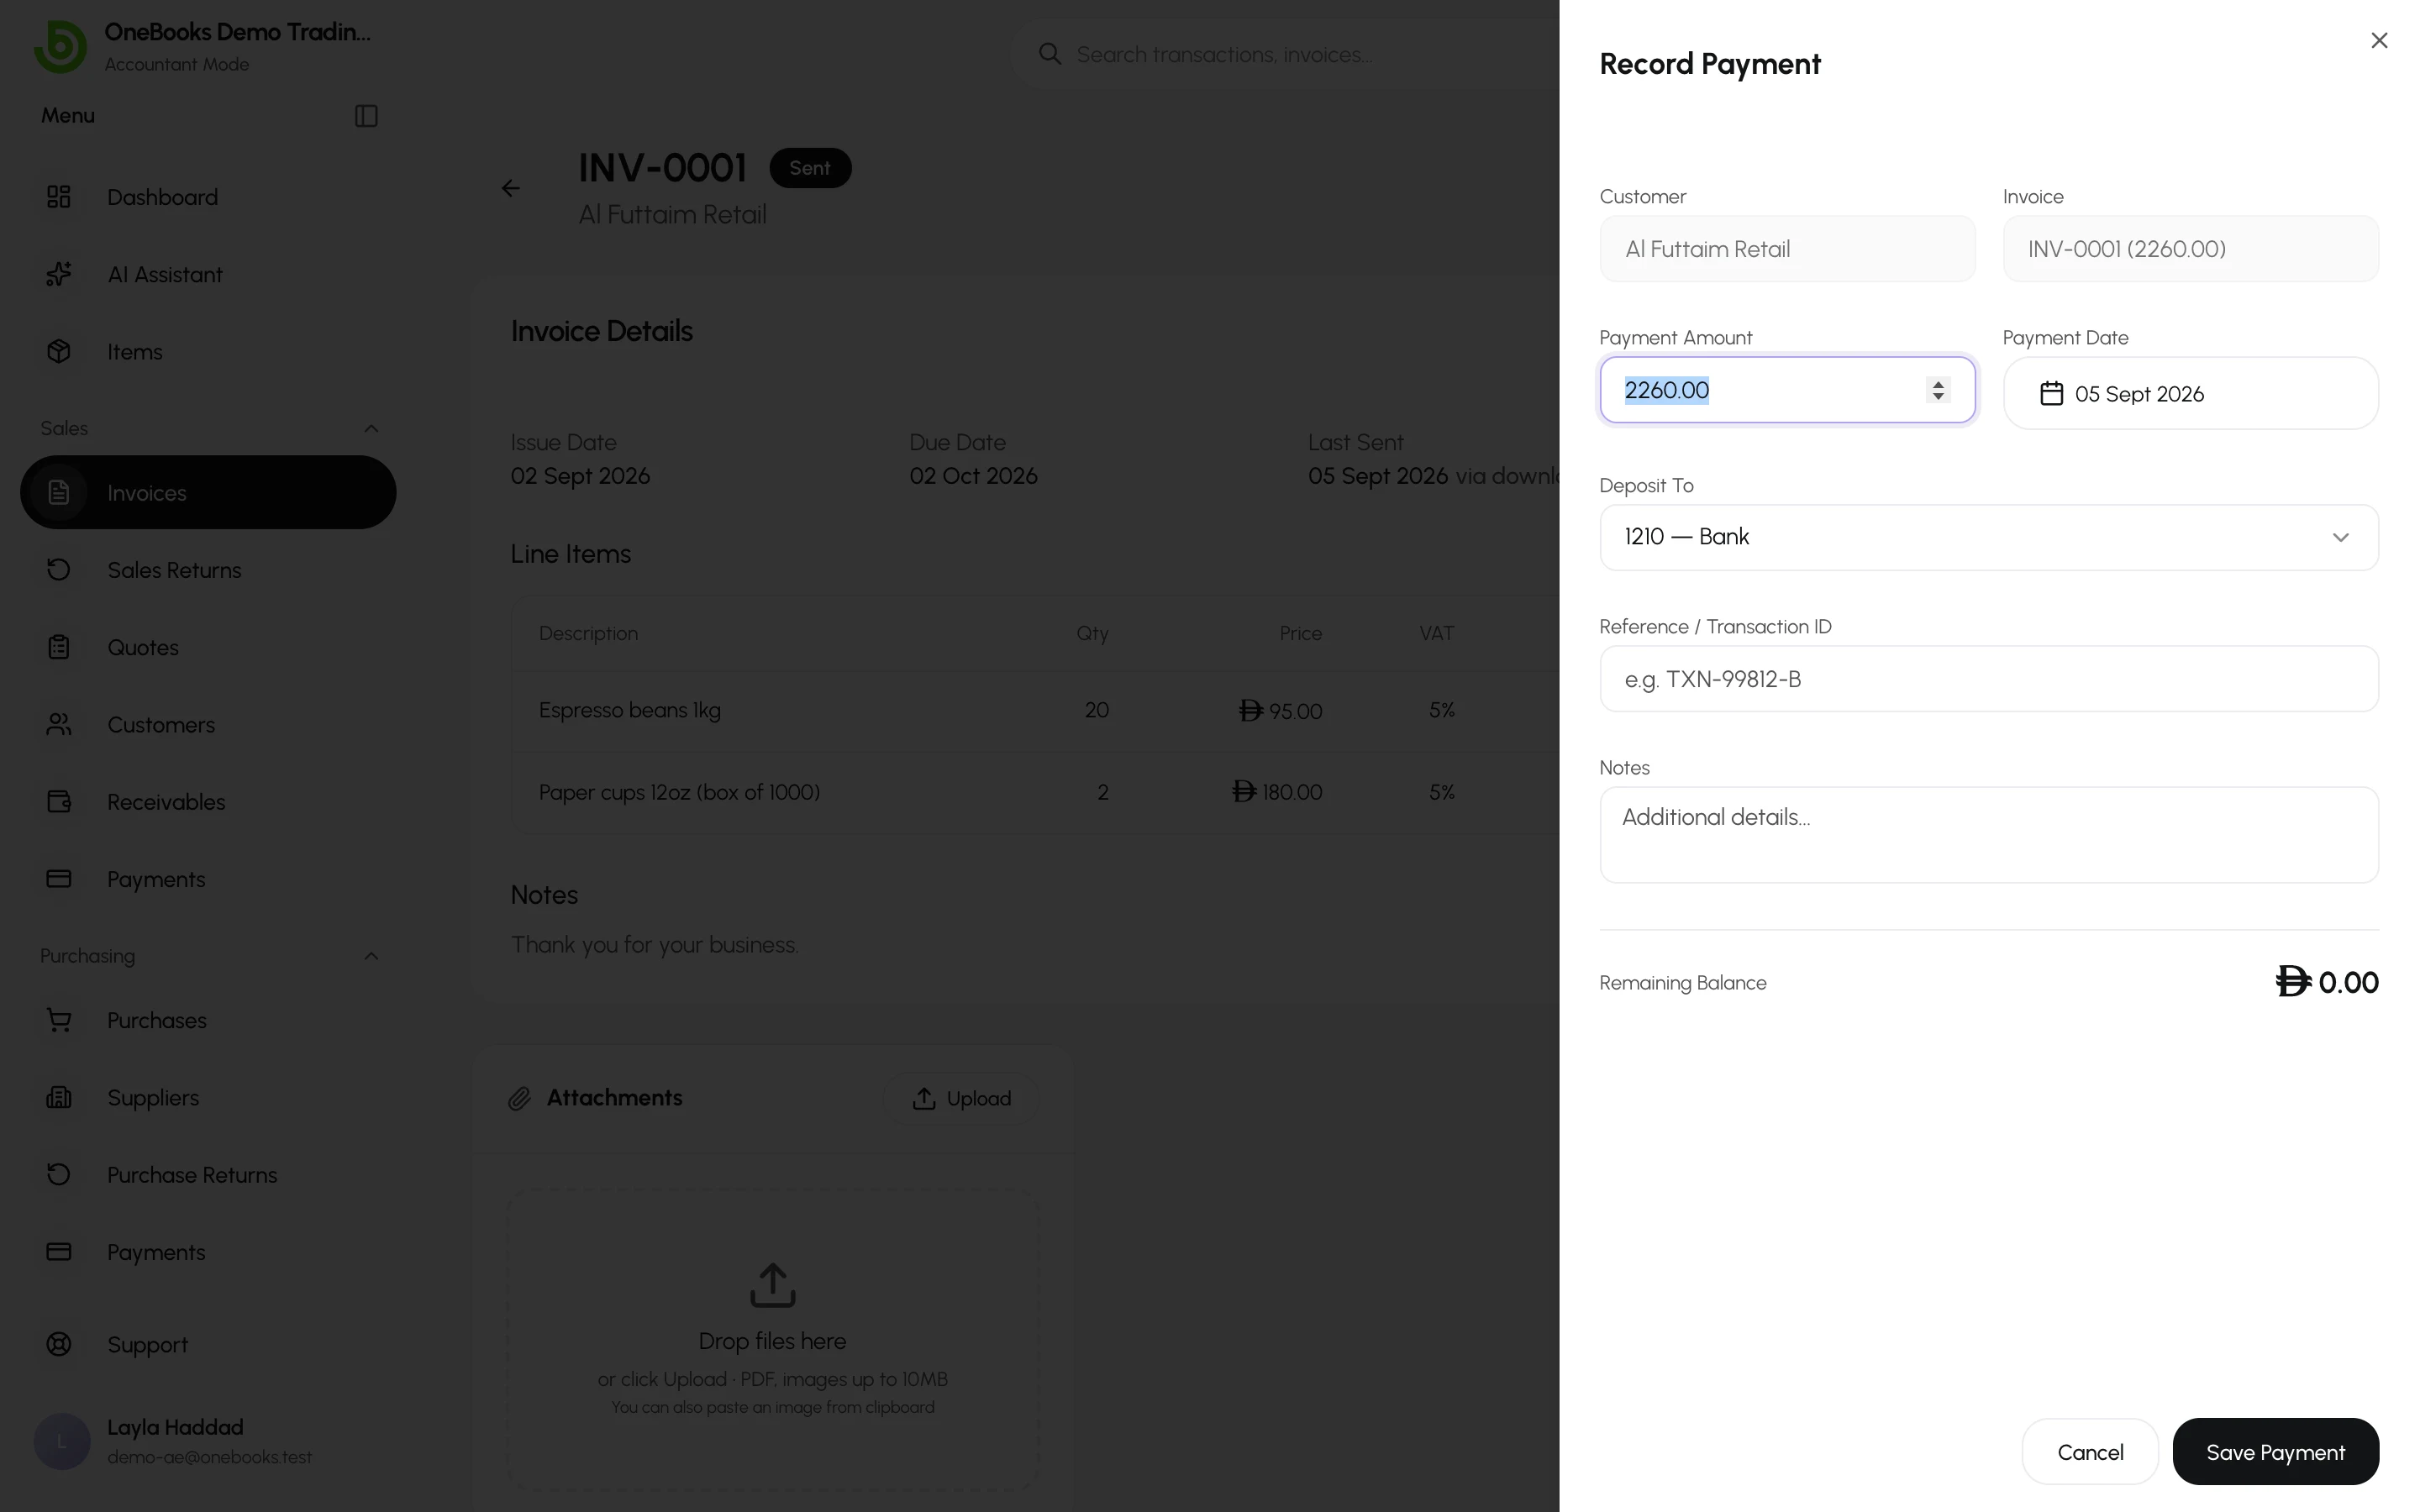
The invoice becomes Partially Paid or Paid, and the dashboard’s receivables figure drops by the amount received.
What you have now
Section titled “What you have now”- A customer with a running balance and statement.
- A numbered, sent invoice with a PDF you can re-download any time.
- A payment linked to the invoice, visible under Sales → Payments.
- Revenue on the Profit and loss, cash on the Balance sheet, and the tax on the Tax report — all computed from the entries above.